

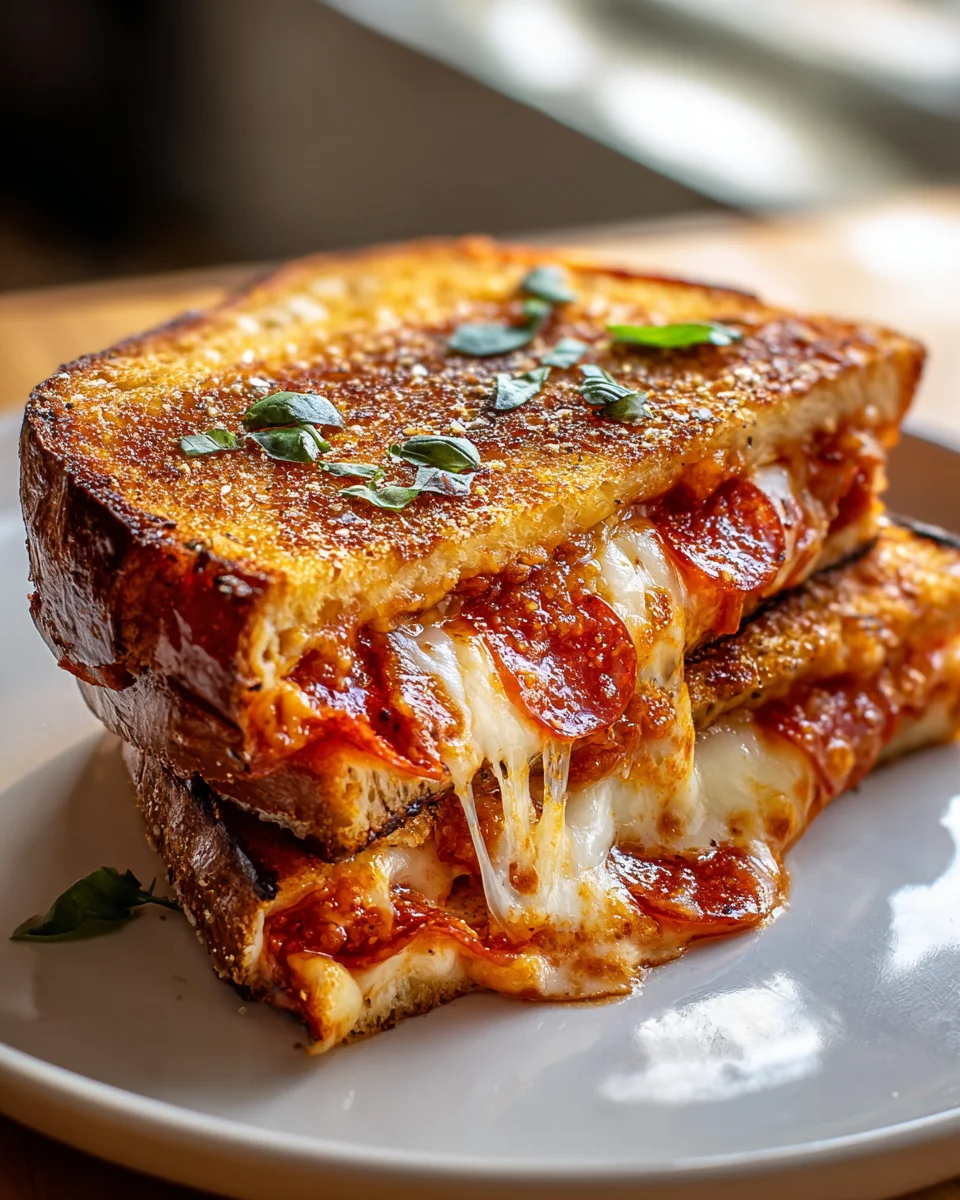
Pizza Grilled Cheese, imagine the ultimate comfort food mashup, a culinary masterpiece that brings together two of the world’s most beloved dishes into one irresistible package. We’re talking about taking the crispy, buttery exterior of a perfectly grilled sandwich and infusing it with all the savory, tangy magic of a classic pizza. It’s a combination so genius, it feels like it should have been around forever.
While traditional pizza boasts centuries of rich Italian heritage and the humble grilled cheese sandwich holds a cherished place in American diner culture, the Pizza Grilled Cheese is a more recent, ingenious innovation born from a collective love for comfort food. It’s a testament to the endless creativity that happens in kitchens when we dare to combine familiar favorites. People adore this dish for countless reasons; it effortlessly marries the gooey, stretchy delight of melted mozzarella, the vibrant zest of tomato sauce, and your favorite pizza toppings—all nestled between two slices of perfectly golden, toasted bread.
This inventive sandwich offers an incredible burst of nostalgic flavor, transforming a simple meal into an exciting culinary adventure. It’s incredibly quick to prepare, making it an ideal choice for busy weeknights, and its undeniable deliciousness makes it an instant hit with both kids and adults alike. Prepare to fall in love with the ultimate comfort creation as we guide you through making the perfect Pizza Grilled Cheese right in your own kitchen.

Ingredients:
- For the Bread:
- 8 slices of your favorite sturdy sandwich bread (sourdough, brioche, or a good quality white bread works wonderfully for a superb Pizza Grilled Cheese)
- For the Butter/Fat Spread:
- 4 tablespoons unsalted butter, softened (or mayonnaise for an extra crispy, golden crust that cooks evenly)
- For the Cheeses (the melty, gooey heart of your Pizza Grilled Cheese):
- 1 cup shredded low-moisture mozzarella cheese (the classic pizza choice, perfect for stretching)
- ½ cup shredded provolone cheese (adds a lovely sharpness and extra melty texture)
- ¼ cup freshly grated Parmesan cheese (for a salty, umami kick)
- For the Sauce:
- ½ cup good quality marinara or pizza sauce (your favorite brand will do, or homemade if you’re feeling ambitious)
- For the Toppings (customize to your pizza grilled cheese dreams!):
- 24-30 slices of mini pepperoni (the small ones crisp up beautifully)
- 2 tablespoons finely diced red onion (optional, for a little zing)
- 2 tablespoons finely diced green bell pepper (optional, for crunch and freshness)
- 1 tablespoon chopped fresh basil (for garnish and a burst of fresh flavor)
- For Seasoning:
- ½ teaspoon garlic powder
- ½ teaspoon dried oregano
- ¼ teaspoon red pepper flakes (optional, for a touch of heat)
- Salt and freshly ground black pepper to taste
Gathering and Prepping Your Ingredients
- Getting Organized: Before we dive into the fun part of making our ultimate Pizza Grilled Cheese, let’s get everything in order. Trust me, a little prep work goes a long way in ensuring a smooth cooking process. I always find that having all my ingredients measured, chopped, and ready to go makes the experience so much more enjoyable and less stressful.
- Cheese, Please! If you’re using block cheeses, now’s the time to shred them. I highly recommend shredding your own mozzarella and provolone from blocks rather than buying pre-shredded bags. Pre-shredded cheeses often contain anti-caking agents that can slightly inhibit their melt factor, and for a grilled cheese, especially a pizza grilled cheese, we want maximum meltiness! Combine your shredded mozzarella, provolone, and grated Parmesan in a medium bowl. Give them a good toss to ensure an even distribution. This blend is going to be incredibly flavorful and stretchy, just like a perfect pizza.
- Sauce Savvy: Open your jar of marinara or pizza sauce. If it’s a bit thick, you can thin it with a tiny splash of water or vegetable broth to make it easier to spread. Conversely, if it seems too watery, you can simmer it gently in a small saucepan for a few minutes to reduce it slightly and concentrate the flavors. You’re aiming for a consistency that will spread easily without soaking into the bread too quickly.
- Topping Triumphs: If you’re adding any optional fresh toppings like red onion or green bell pepper, make sure they are very finely diced. We want them to cook through and soften within the short cooking time of the grilled cheese, and larger pieces might stay raw or make the sandwich structurally unstable. Lay out your mini pepperoni slices; these little guys are fantastic because they get wonderfully crispy and distribute flavor evenly throughout our Pizza Grilled Cheese. Lastly, chop your fresh basil, but save it for the very end as a garnish to maintain its vibrant color and fresh aroma.
- Butter Up (or Mayo Up!): Ensure your butter is softened. If it’s straight from the fridge, you can gently microwave it for a few seconds until it’s pliable, but not melted. If you’re using mayonnaise for the exterior of the bread, have it ready. Both options create an incredibly golden, crispy crust, but I’ve found mayonnaise provides a remarkably even browning and a slight tang that complements the richness of the cheese and sauce. You can also mix a little garlic powder and dried oregano into your softened butter or mayonnaise for an extra boost of flavor on the crust itself!
Assembling Your Pizza Grilled Cheese
- The Foundation: Lay out your eight slices of bread on a clean work surface. My favorite bread for this endeavor is a good quality sourdough or a sturdy white sandwich bread, as they hold up well to the moisture from the sauce and the heat of the skillet without becoming soggy.
- Butter/Mayo One Side: Take four of your bread slices and generously spread a thin, even layer of softened butter or mayonnaise on one side of each slice. This is the side that will hit the hot pan first, forming that beautiful, golden-brown crust. Set these four slices aside, buttered-side down.
- Building the First Layer: Now, let’s work on the remaining four slices of bread, which will be the bottom slices of your four sandwiches. On the unbuttered side of each of these four slices, spread about 1 to 1 ½ tablespoons of your marinara or pizza sauce. Don’t go overboard here; too much sauce can make your sandwich soggy. We’re aiming for a thin, flavorful layer.
- Cheese Base: Evenly distribute about a quarter of your mixed cheese blend (mozzarella, provolone, Parmesan) over the sauced side of each of these four bread slices. The cheese acts as a barrier to the sauce, helping to prevent the bread from getting too wet, and it’s also the first layer of gooey goodness!
- Topping Time! Now’s where the “pizza” in Pizza Grilled Cheese really comes to life. On top of the cheese layer, arrange about 6-8 mini pepperoni slices on each sandwich. If you’re using diced red onion or green bell pepper, sprinkle a small amount over the pepperoni. Remember, less is more with interior toppings to ensure even cooking and melting.
- More Cheese, Please: Sprinkle another quarter of your mixed cheese blend over the toppings on each sandwich. This second layer of cheese will help to “glue” everything together when it melts, creating a cohesive, delicious filling. It also ensures maximum cheese pull!
- Seasoning the Filling: Lightly sprinkle each of the assembled halves with a pinch of garlic powder, dried oregano, and optionally, red pepper flakes. A tiny grind of black pepper won’t hurt either. These seasonings are key to replicating that authentic pizza flavor profile within your grilled cheese.
- The Top Layer: Take the four remaining bread slices that you set aside (the ones with butter/mayonnaise on one side). Place one of these slices, buttered-side up, on top of each of your assembled halves. You now have four beautiful, ready-to-cook Pizza Grilled Cheese sandwiches! Take a moment to gently press down on each sandwich to lightly compact the fillings. This helps everything stay together during cooking.
Cooking Your Masterpiece
- Heat the Pan: Place a large non-stick skillet or a cast-iron pan over medium-low heat. This step is crucial! You want the pan to heat up gradually and evenly. Resist the urge to crank up the heat. A lower, slower heat is the secret to perfectly golden-brown bread and fully melted, gooey cheese without burning the outside. Give the pan a good 2-3 minutes to come up to temperature.
- Into the Pan They Go: Once your pan is heated, carefully place two of your assembled Pizza Grilled Cheese sandwiches into the skillet, buttered-side down. Don’t overcrowd the pan; cooking two at a time allows for better heat distribution and easier flipping. If your pan is larger, you might be able to fit all four, but ensure there’s still a little space between each sandwich.
- First Side Sizzle: Cook for 3-5 minutes on the first side. During this time, the bread should start to turn a beautiful golden brown, and the cheese inside should begin to melt. Keep an eye on it! Every stovetop and pan is different, so use your senses. Peek underneath one of the sandwiches by gently lifting it with a spatula. You’re looking for that perfect, appealing golden-brown hue. While it’s cooking, you’ll likely hear the gentle sizzle of the butter and bread, and you might even catch the aroma of the toasting bread and melting cheese. This is a good sign!
- The Flip: Once the first side is perfectly golden, use a wide, sturdy spatula to carefully flip each sandwich. Be confident in your flip! If you hesitate, you might displace some of the delicious filling. The second side will now be exposed to the heat, ready to get equally crispy and golden.
- Second Side Sizzle and Melt: Continue cooking for another 3-5 minutes on the second side. During this phase, it’s not just about browning the bread; it’s also about ensuring the cheese inside is completely melted and oozy, and any interior toppings have warmed through. You can even gently press down on the sandwiches with your spatula a few times to encourage even contact with the pan and help with melting. If the bread seems to be browning too quickly, slightly reduce the heat. If it’s not browning enough, you can increase the heat just a touch. The goal is perfectly toasted bread and gloriously melted cheese.
- Checking for Doneness: The ultimate test for a perfectly cooked Pizza Grilled Cheese is twofold: a beautiful, evenly golden-brown crust on both sides, and a wonderfully gooey, molten interior. Gently press on the top of the sandwich; if it yields slightly and feels soft, it’s a good indication the cheese has melted. If you’re unsure, you can carefully lift the top piece of bread slightly to peek inside.
- Repeat if Necessary: If you’re cooking in batches, remove the first two sandwiches from the pan and repeat steps 15-19 with the remaining two sandwiches. You might need to adjust the heat slightly for the second batch if the pan has gotten too hot.
Optional: Finishing Touches and Serving
- Resting Period: Once your Pizza Grilled Cheese sandwiches are cooked to perfection, transfer them to a cutting board. I know it’s tempting to dive right in, but allow them to rest for about 1-2 minutes. This brief resting period allows the cheese to set slightly, preventing it from all running out when you cut into it, and makes for a neater, more enjoyable eating experience. It also gives the bread a moment to crisp up just a touch more from residual heat.
- The Perfect Cut: Using a sharp knife, carefully slice each sandwich in half, either diagonally (my preferred method for maximum visual appeal and easier handling) or straight down the middle. As you cut, you should hear that satisfying crunch of the toasted bread and see the glorious, stretchy cheese pull. This is the moment of truth!
- Garnish and Serve: Arrange your beautiful Pizza Grilled Cheese halves on plates. For an extra touch of freshness and flavor, sprinkle the chopped fresh basil over the tops just before serving. The vibrant green against the golden bread and red sauce is simply irresistible.
- Enjoy Immediately! This is not a dish that benefits from waiting. Serve your incredible Pizza Grilled Cheese immediately while it’s hot, the cheese is at its peak melty stage, and the bread is wonderfully crispy. It’s fantastic on its own, or you can serve it with a side of extra marinara sauce for dipping – because who doesn’t love more dip? Enjoy every cheesy, saucy bite of your homemade pizza grilled cheese experience!
Conclusion:
And there you have it, friends! We’ve reached the delicious culmination of our culinary journey. After exploring the simple steps and incredible potential of this dish, I truly believe you’ll agree that this isn’t just another sandwich; it’s a game-changer, a comfort food hero, and an absolute must-try for anyone who appreciates the finer things in life—especially when those things involve gooey cheese and crispy bread.
What makes this recipe such a standout? It’s the ingenious marriage of two universally loved classics, perfected into one utterly irresistible creation. The way the tangy marinara, savory pepperoni (or your chosen fillings), and generous layers of melting mozzarella and provolone come together between two slices of golden, buttered bread is nothing short of magical. It’s quick enough for a busy weeknight, yet decadent enough to feel like a special treat. There’s a comforting nostalgia baked into every bite, reminiscent of childhood pizza parties and the simple joy of a perfectly grilled cheese sandwich, but elevated to an entirely new dimension. This isn’t just food; it’s an experience, a delightful surprise for your taste buds, and I’m confident it will quickly become a cherished staple in your home.
Now, let’s talk about how to make this experience even better, or how to truly make it your own. While perfectly delicious on its own, your incredible Pizza Grilled Cheese sandwich pairs beautifully with a warm bowl of creamy tomato soup or a robust minestrone for a classic comfort meal. For something lighter, a crisp green salad with a zesty vinaigrette provides a wonderful contrast to the richness of the sandwich. Don’t shy away from having an extra dish of warm marinara for dipping; it just amplifies that pizza parlor feel!
But the true beauty of this recipe lies in its boundless adaptability. Feel free to unleash your inner chef and get creative with variations! Think beyond pepperoni; cooked crumbled sausage, sautéed mushrooms, thinly sliced bell peppers, or even a sprinkle of red pepper flakes for a kick, can all find a happy home within these cheesy layers. Experiment with different cheeses too—a touch of smoked gouda could add depth, or fresh basil leaves tucked inside before grilling will brighten the flavors beautifully. For a sophisticated twist, try using a robust sourdough or ciabatta bread instead of your usual white bread. You could even swap out the classic marinara for a pesto base for a vibrant, herbaceous alternative. The possibilities are truly endless, and each variation promises a unique, delightful adventure for your palate. Imagine a “Supreme” version with olives, onions, and peppers, or a “Meat Lovers” with ham and bacon bits – truly, the only limit is your imagination!
So, what are you waiting for? I wholeheartedly encourage you to roll up your sleeves, gather your ingredients, and give this extraordinary recipe a try this week. It’s incredibly simple to execute, profoundly satisfying to eat, and promises to bring a smile to everyone at your table. I am genuinely excited for you to experience the sheer deliciousness and ease this dish offers. Once you’ve made it, I’d absolutely love to hear about your experience! Did you stick to the classic version, or did you venture into creative new toppings? What did your family think? Please, come back and share your stories, your photos, and any brilliant variations you discover. Your culinary adventures inspire me, and I can’t wait to see how you make this magnificent sandwich your very own.
Pizza Grilled Cheese
The ultimate comfort food mashup, a culinary masterpiece that combines the crispy, buttery exterior of a grilled sandwich with the savory, tangy magic of a classic pizza. Quick to prepare and a hit with all ages.
Ingredients
Instructions
Important Information
Nutrition Facts (Per Serving)
It is important to consider this information as approximate and not to use it as definitive health advice.
Allergy Information
Please check ingredients for potential allergens and consult a health professional if in doubt.

Leave a Comment