

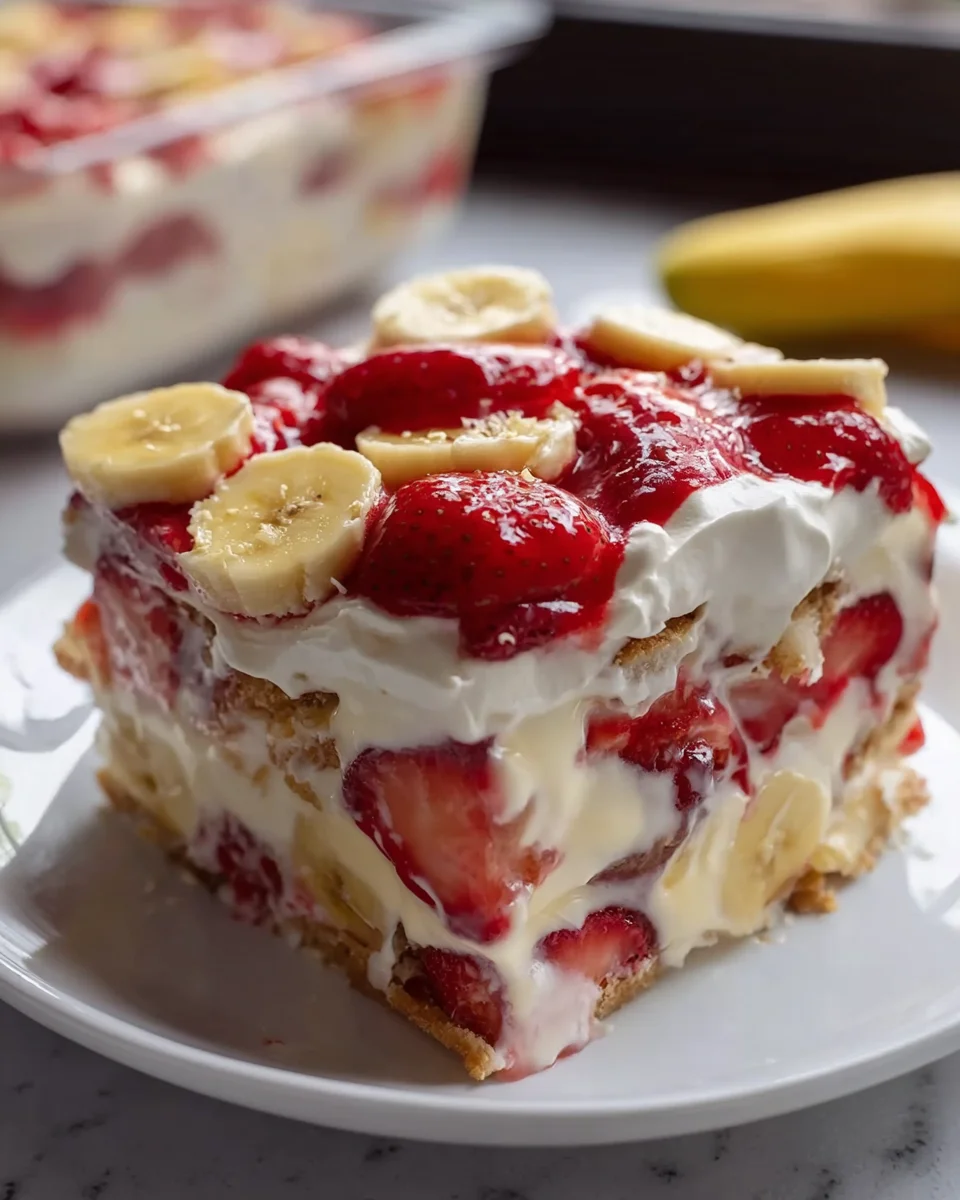
Strawberry Banana Pudding Dream Recipe is more than just a dessert; it’s a spoonful of pure, unadulterated joy that transports you straight back to your happiest memories. I’m absolutely thrilled to share with you a culinary creation that perfectly marries the classic comfort of Southern banana pudding with the fresh, vibrant burst of ripe strawberries. Imagine layers of creamy, sweet vanilla pudding, tender ripe bananas, juicy strawberries, and crisp vanilla wafers, all coming together in a symphony of flavors and textures that dance on your palate.
This isn’t just any dessert; it’s a modern twist on a beloved American classic, a dish that has graced countless family gatherings and Sunday dinners. While traditional banana pudding holds a special place in our hearts, the addition of strawberries elevates it to an entirely new level, offering a refreshing counterpoint to its rich creaminess. People simply adore this Strawberry Banana Pudding Dream Recipe because it’s incredibly easy to assemble, yet yields an impressive, show-stopping dessert that appeals to all ages. It’s the ultimate crowd-pleaser, delivering a delightful balance of sweetness, fruitiness, and comforting creaminess with every single bite.
Get ready to create a masterpiece that will have everyone asking for seconds!

Ingredients:
- For the Creamy Vanilla Pudding:
- 1 cup granulated sugar
- 1/2 cup all-purpose flour
- 1/2 teaspoon salt
- 4 large egg yolks
- 3 cups whole milk, divided (preferably room temperature)
- 1/4 cup unsalted butter, cut into small pieces
- 2 teaspoons pure vanilla extract
- For the Dreamy Whipped Cream:
- 2 cups heavy cream (also known as heavy whipping cream), chilled
- 1/2 cup powdered sugar (confectioners’ sugar), sifted
- 1 teaspoon pure vanilla extract
- For the Fresh Fruit Layers:
- 2 lbs fresh strawberries, hulled and sliced (about 4 cups)
- 4-5 ripe but firm bananas, sliced (about 4-5 cups)
- For the Vanilla Wafer Layers:
- 1 (11-ounce) box vanilla wafers (about 75-80 wafers)
- For Garnish (Optional):
- Reserved whole strawberries or fanned strawberry slices
- Additional vanilla wafers, crushed or whole
- Fresh mint sprigs
Phase 1: Preparing the Creamy Vanilla Pudding Base
- Whisking Dry Ingredients and Egg Yolks: In a medium-sized, heavy-bottomed saucepan, I like to combine the granulated sugar, all-purpose flour, and salt. I whisk these dry ingredients thoroughly to ensure there are no lumps, which is a crucial step for a silky-smooth pudding. In a separate small bowl, I’ll lightly whisk the four egg yolks until they are just combined and appear a pale yellow. Set these aside for now.
- Heating the Milk and Creating the Slurry: Gradually, I pour 2 cups of the whole milk into the saucepan with the dry ingredients, whisking continuously until the mixture is smooth and completely free of lumps. This creates a thick slurry. Once smooth, I place the saucepan over medium heat. It’s important to stir constantly with a whisk, making sure to scrape the bottom and sides of the pan, to prevent scorching. I continue cooking and stirring until the mixture begins to thicken and small bubbles appear around the edges, usually after about 5-7 minutes.
- Tempering the Egg Yolks: This is a key step to prevent scrambled eggs in your pudding! While the milk mixture is heating, I slowly pour about half a cup of the hot milk mixture into the bowl with the whisked egg yolks, whisking constantly and vigorously. This gradual heating of the egg yolks is called tempering, and it gently brings their temperature up without cooking them too fast. Once tempered, I pour the egg yolk mixture back into the saucepan with the remaining hot milk mixture, whisking all the while.
- Finishing the Pudding Cook: Return the saucepan to medium heat. I continue to cook and whisk constantly for another 2-3 minutes. You’ll notice the pudding will thicken significantly and become very glossy. A good test for doneness is when the pudding coats the back of a spoon and when you run your finger across the back of the spoon, the line remains clear without the pudding running back into it. Be careful not to boil the pudding vigorously, as this can cause it to break.
- Adding Butter and Vanilla, Then Cooling: Once the pudding has reached the desired thickness, I remove it from the heat immediately. I stir in the unsalted butter, piece by piece, allowing each piece to melt completely and incorporate into the pudding. Then, I stir in the pure vanilla extract. For the smoothest pudding, I sometimes pass it through a fine-mesh sieve at this point, but it’s optional if you’ve whisked well. To cool the pudding, I transfer it to a clean bowl and place a piece of plastic wrap directly onto the surface of the pudding. This prevents a skin from forming. I let it cool at room temperature for about 30 minutes, then transfer it to the refrigerator to chill completely for at least 1-2 hours. The pudding needs to be cold before assembly to ensure the best texture and structure for our Strawberry Banana Pudding Dream Recipe.
Phase 2: Whipping Up the Dreamy Topping
- Chilling Equipment for Best Results: For the fluffiest whipped cream, I always ensure my mixing bowl (preferably metal or glass) and whisk attachment (if using a stand mixer) or beaters (for a hand mixer) are thoroughly chilled. I usually pop them in the freezer for 15-20 minutes before I start. This cold environment helps the cream whip up faster and hold its volume better.
- Whipping the Heavy Cream: Pour the two cups of very cold heavy cream into the chilled bowl. Using an electric mixer on medium-high speed, I begin to whip the cream. At first, it will look foamy, then it will start to thicken. I watch it carefully, as the transition from soft peaks to stiff peaks can happen quickly.
- Adding Sweetener and Vanilla: Once the cream forms soft peaks (meaning it holds its shape somewhat but the tip curls over), I gradually add the sifted powdered sugar and the pure vanilla extract. Sifting the powdered sugar is important to avoid any lumps in your smooth whipped cream. I continue to whip until the cream forms stiff peaks – when you lift the whisk, the peaks stand up straight without drooping. Be careful not to over-whip the cream, or it can become grainy and eventually turn into butter. This dreamy whipped cream will be the beautiful crown of our Strawberry Banana Pudding Dream Recipe.
Phase 3: Prepping the Fresh Fruit and Wafers
- Washing and Slicing the Strawberries: I start by gently rinsing the fresh strawberries under cool water and patting them dry with paper towels. Then, I hull them (remove the green tops). For slicing, I aim for about 1/4-inch thick slices. This size ensures they are delicate enough to layer beautifully and provide a burst of fresh flavor without overwhelming the other components of the pudding. The vibrant red of the strawberries will be stunning against the creamy layers in our Strawberry Banana Pudding Dream Recipe.
- Slicing the Bananas: For the bananas, I choose ones that are ripe but still firm, as overly ripe bananas can get mushy too quickly. I peel them carefully and then slice them into rounds, again about 1/4-inch thick. To prevent the bananas from browning too quickly, especially if you anticipate some time before assembly or consumption, you can lightly toss them in a teaspoon of lemon juice or a solution of water with a tiny pinch of citric acid. However, for a quick assembly and immediate chilling, I often skip this step to maintain their pure flavor.
- Preparing the Vanilla Wafers: I simply open the box of vanilla wafers. I like to keep some whole for the structural layers and might crush a few extra for a garnish, if desired. These crispy, buttery wafers will soften beautifully as they absorb the flavors from the pudding and fruit, creating that classic banana pudding texture that is so irresistible in this Strawberry Banana Pudding Dream Recipe.
Phase 4: Assembling Your Strawberry Banana Pudding Dream
- Choosing Your Dish: For this delightful Strawberry Banana Pudding Dream Recipe, I recommend using a large, clear glass trifle bowl (about 3-4 quart capacity) or a 9×13-inch baking dish. A clear dish really allows you to appreciate the beautiful layers of fruit, pudding, and cream.
- First Layer of Vanilla Wafers: I start by arranging a single layer of vanilla wafers on the bottom of your chosen dish. I try to cover the entire base as much as possible, breaking some wafers if necessary to fit snugly. This layer will absorb moisture and become wonderfully cake-like.
- First Layer of Sliced Bananas: Next, I evenly distribute about half of your sliced bananas over the vanilla wafers. I like to place them neatly, making sure each bite will have a good amount of banana.
- First Layer of Sliced Strawberries: Now, I artfully arrange about half of the sliced strawberries over the bananas. Their vibrant color will peek through and promise a burst of fruity freshness.
- First Layer of Creamy Vanilla Pudding: Gently spoon about half of the completely chilled vanilla pudding over the strawberries and bananas. I use the back of a spoon or an offset spatula to spread it evenly, making sure to cover all the fruit and wafers.
-
Repeating the Layers for Depth of Flavor: Now, we repeat the layering process!
- First, another layer of vanilla wafers, ensuring good coverage.
- Then, I place the remaining sliced bananas evenly over the wafers.
- Following that, the remaining sliced strawberries are spread over the bananas.
- Finally, the remaining vanilla pudding is carefully spooned over the second fruit layer and spread smooth.
- This careful layering builds the incredible structure and flavor profile of our Strawberry Banana Pudding Dream Recipe.
- The Grand Finale: Top Layer of Dreamy Whipped Cream: Once all the pudding layers are in place, I lovingly spread the entire amount of your freshly whipped cream over the top. I often like to create a slightly textured, swirled top with the back of a spoon or an offset spatula for an inviting look.
- Optional Garnish for Visual Appeal: For an extra touch of elegance and freshness, I garnish the top of the pudding. You can arrange a few whole strawberries, fan out some strawberry slices, sprinkle some crushed vanilla wafers, or even add a few fresh mint sprigs. This makes your Strawberry Banana Pudding Dream Recipe truly picture-perfect and ready to impress!
Phase 5: Chilling for Perfection
- The Essential Chill Time: Once assembled, I cover the trifle bowl or baking dish tightly with plastic wrap. It is absolutely crucial to chill the pudding in the refrigerator for at least 4 hours, but preferably overnight. This extended chilling time allows all the flavors to meld beautifully, the vanilla wafers to soften to that delightful cake-like consistency, and the entire pudding to set up perfectly. Rushing this step will result in a less cohesive and less flavorful dessert. Trust me, the wait is worth it for this divine Strawberry Banana Pudding Dream Recipe.
- Serving Your Dream: When you’re ready to serve, remove the pudding from the refrigerator. If you used a trifle bowl, the beautiful layers will be visible from the sides, adding to the allure. Use a large serving spoon to scoop generous portions into individual bowls. Each serving will be a delightful medley of creamy vanilla pudding, sweet fresh strawberries, tender bananas, and softened vanilla wafers, all topped with fluffy whipped cream. Prepare for compliments, as this Strawberry Banana Pudding Dream Recipe is truly a showstopper!
Conclusion:
As we wrap up our delightful journey through the making of what I truly believe is one of the most irresistible desserts you’ll ever encounter, I hope you’re feeling as inspired and hungry as I am! This isn’t just a recipe; it’s an invitation to create a moment of pure bliss. The magic of this particular confection lies in its incredible balance: the natural sweetness and slight tang of fresh strawberries, the creamy, comforting richness of ripe bananas, and the silky smooth embrace of a perfectly set pudding. All these elements come together to deliver a dessert that is not only unbelievably easy to assemble but also promises a symphony of flavors and textures with every single spoonful. It’s the kind of treat that brings a smile to everyone’s face, from the youngest family member to the most discerning palate, making it an absolute must-try for your next gathering or simply for a cozy evening at home.
Why This Recipe Stands Out
What sets this dessert apart is its remarkable ability to feel both incredibly luxurious and wonderfully comforting at the same time. You might think such a decadent treat would require hours in the kitchen, but one of its greatest virtues is its simplicity. It truly is a testament to the fact that some of the best culinary experiences come from straightforward ingredients and minimal fuss. The combination of tender fruit, creamy layers, and perhaps a delicate crumb from a wafer or cookie creates a textural masterpiece that is profoundly satisfying. It’s a dessert that feels celebratory yet humble, perfect for any occasion that calls for a touch of homemade sweetness. If you’re searching for a dessert that consistently delivers on flavor, ease, and sheer joy, then you’ve found your new go-to.
Serving Suggestions and Creative Variations to Elevate Your Experience
While this dessert is utterly perfect served simply, chilled to perfection, there are so many delightful ways to present and adapt it to suit your mood or occasion. For a classic presentation, serve generous scoops in elegant glass bowls or parfait glasses, allowing the beautiful layers to shine through. A dollop of freshly whipped cream on top is always a welcome addition, providing an extra cloud of richness that melts deliciously. For a touch of sophistication, consider garnishing with a few extra fresh strawberry slices, a sprinkle of toasted pecans or walnuts for a nutty crunch, or even a light dusting of cocoa powder for a subtle bitter contrast. The visual appeal alone will have everyone reaching for a spoon.
But don’t stop there! The beauty of this recipe is its incredible versatility, inviting you to put your own creative spin on it. If you’re feeling adventurous, why not explore some variations? Instead of traditional vanilla pudding, you could try a rich banana cream pudding for an intensified banana flavor, or even a subtle coconut pudding to add an exotic twist. While Nilla wafers are a beloved classic for their gentle crunch and vanilla essence, feel free to experiment with other cookies; crushed shortbread or even gingersnaps could offer a delightful new dimension. For a berry blast, incorporate other fruits like raspberries or blueberries alongside the strawberries, creating a vibrant medley of flavors and colors. For an adult-friendly version, a tiny splash of a complementary liqueur, such as a fruit brandy or a good quality rum, can be folded into the pudding mixture for an extra layer of warmth and complexity – just be mindful of who will be enjoying it!
Consider individual servings for parties or picnics. Layer the dessert in small mason jars or clear ramekins. These are not only adorable but also incredibly practical, making portion control easy and presentation beautiful. You can even prepare them ahead of time, chilling them until ready to serve, which makes hosting a breeze. Imagine a tray of these delightful individual treats, each one a miniature masterpiece ready to be savored.
Your Turn: Embrace the Joy of Creation!
Now, it’s truly your moment to shine! I wholeheartedly encourage you to roll up your sleeves and dive into making this wonderful dessert. Experience firsthand the simplicity and profound satisfaction that comes from creating something so delicious from scratch. This isn’t just about following instructions; it’s about making memories, sharing joy, and savoring the sweet rewards of your efforts. I can’t wait for you to discover the magic of the Strawberry Banana Pudding Dream Recipe for yourself. Once you’ve made it, tasted it, and shared it, please come back and tell me all about your experience! What variations did you try? Who did you share it with? Your stories, tips, and photos truly inspire me and our entire community of dessert lovers. Happy baking, and get ready to indulge in something truly extraordinary!
Strawberry Banana Pudding Dream: Easy No-Bake Recipe!
A delightful no-bake dessert featuring layers of creamy vanilla pudding, ripe bananas, fresh strawberries, and crisp vanilla wafers, topped with fluffy whipped cream. An easy, crowd-pleasing treat!
Ingredients
Instructions
Important Information
Nutrition Facts (Per Serving)
It is important to consider this information as approximate and not to use it as definitive health advice.
Allergy Information
Please check ingredients for potential allergens and consult a health professional if in doubt.


Leave a Comment