

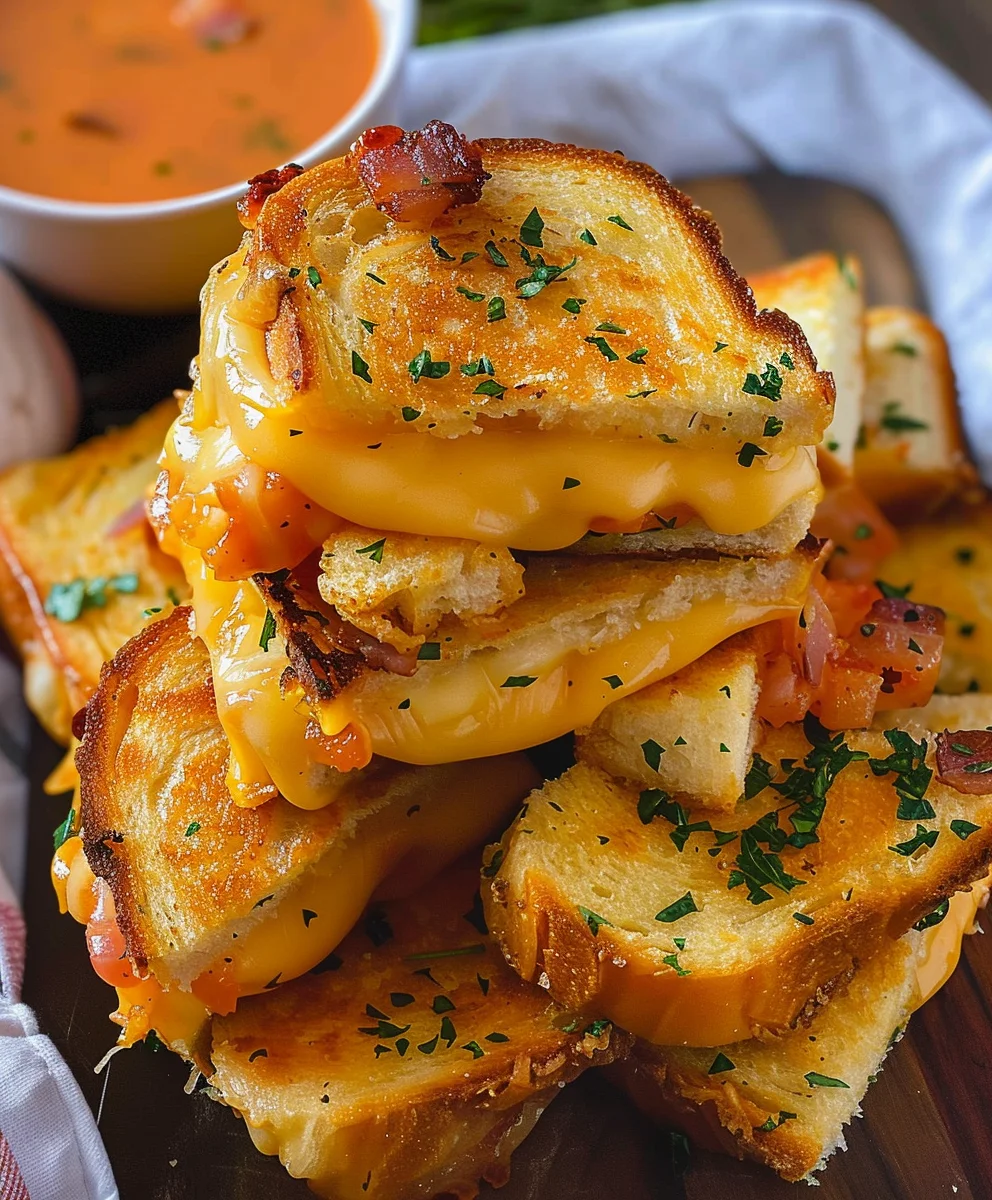
This Hawaiian Roll Grilled Cheese Recipe Is The Best, and I promise, once you experience this irresistible fusion of sweet and savory, your perspective on comfort food will be forever changed. Imagine the golden, buttery crispness of a perfectly grilled Hawaiian sweet roll, its subtle sweetness a delightful counterpoint to the rich, gooey, melted cheese within. It’s not just a sandwich; it’s an elevated culinary experience that takes a beloved classic and transforms it into something truly extraordinary.
While the traditional grilled cheese holds a special place in our hearts as a quintessential comfort food, this rendition introduces a captivating dimension. The renowned King’s Hawaiian rolls, with their distinct fluffy texture and touch of aloha sweetness, elevate a simple concept into a gourmet delight. This unique combination offers a symphony of textures and flavors: a slightly caramelized exterior, a wonderfully soft interior, and that glorious stretch of warm, savory cheese.
Why This Dish Is a Must-Try
People absolutely adore this dish not only for its incredible taste and satisfying texture but also for its sheer simplicity and universal appeal. It’s perfect for a quick lunch, a cozy dinner, or even a fun party appetizer. The sweetness of the bread truly makes the savory cheese pop, creating a balanced and incredibly addictive bite every time. Trust me when I say, This Hawaiian Roll Grilled Cheese Recipe Is The Best because it masterfully blends nostalgic comfort with an unexpected, delicious twist that everyone will crave.

Ingredients:
- One 12-count package of King’s Hawaiian Sweet Rolls: These are absolutely essential for this recipe. Their inherent sweetness and incredibly soft, pillowy texture are what elevate this grilled cheese from good to phenomenal. You’ll want to keep them in their block form for the initial preparation.
- 1/2 cup (1 stick) unsalted butter, melted: I always opt for unsalted butter so I can control the salt content myself. If you only have salted butter, just be mindful when adding any additional salt to the butter mixture or directly to the sandwich. You’ll want this melted gently, either in the microwave or a small saucepan, so it’s easy to brush.
- 4 ounces (about 6 slices) sharp cheddar cheese: I love the tangy, robust flavor that sharp cheddar brings. It melts beautifully and adds that classic grilled cheese taste. You can use mild or medium cheddar if you prefer a less intense flavor.
- 4 ounces (about 6 slices) provolone cheese: This cheese offers a wonderful, stringy melt and a slightly nutty, mild flavor that complements the cheddar perfectly. Deli-sliced provolone works best for even layering.
- 4 ounces shredded low-moisture, part-skim mozzarella cheese: While the slices provide structure, the shredded mozzarella ensures an incredibly gooey, melty center. It helps fill any gaps and guarantees cheese in every bite.
- 1/2 teaspoon garlic powder (optional, but highly recommended): Mixed into the melted butter, this adds an aromatic, savory kick that truly enhances the flavor profile of the entire sandwich. It’s a game-changer!
- 1/4 teaspoon dried parsley (optional): Also mixed into the butter, this adds a subtle herby note and a touch of color. You could also use fresh chopped parsley for garnish later.
- Pinch of sea salt and freshly ground black pepper (optional): For seasoning the butter mixture or to sprinkle directly over the cheese layers for an extra depth of flavor.
Preparation: Assembling Your Grilled Cheese Masterpiece
-
Prepare the Hawaiian Rolls for Easy Assembly:
The first crucial step is to prepare your King’s Hawaiian Sweet Rolls. Carefully remove the entire block of 12 rolls from its packaging. You want to keep them connected at this stage. Using a long, serrated knife, slice the entire block of rolls horizontally, parallel to your cutting board. The goal here is to create a top half and a bottom half, almost like a giant burger bun. Take your time to make a clean, even cut through all the rolls at once. This ensures that when you reassemble them, they fit together perfectly. I find that holding the top of the block firmly with one hand while sawing gently with the other works best. We want to avoid separating the individual rolls until after cooking.
-
Craft Your Flavor-Infused Butter Mixture:
In a small bowl, melt your 1/2 cup of unsalted butter. You can do this in the microwave in 30-second intervals until fully liquid, or gently on the stovetop. Once melted, stir in the 1/2 teaspoon of garlic powder and 1/4 teaspoon of dried parsley, if you’re using them. This simple addition elevates the butter from a mere cooking medium to a flavorful component that permeates every bite of your grilled cheese. I often add a tiny pinch of sea salt and freshly ground black pepper to this mixture too, just to round out the flavors. Give it a good whisk to ensure everything is well combined. This is where a lot of the magic begins!
-
Butter the Bottom Layer Generously:
Place the bottom half of your sliced Hawaiian rolls, cut-side up, on a clean cutting board or a baking sheet. Using a pastry brush, generously spread about half of your melted garlic-herb butter mixture evenly over the entire cut surface of the bottom rolls. Make sure to get into all the nooks and crannies. This butter layer will create that irresistible crispy, golden-brown crust on the bottom of your grilled cheese. Don’t be shy here; the butter is key to that perfect texture and flavor.
-
Layer Your Cheeses for Ultimate Gooeyness:
Now comes the fun part: layering the cheese! Arrange the slices of sharp cheddar cheese evenly over the buttered bottom half of the rolls. Try to cover as much surface area as possible. Next, add the slices of provolone cheese on top of the cheddar. Finally, sprinkle the shredded mozzarella cheese over the provolone. The combination of these three cheeses creates a symphony of flavor and texture – the tang of cheddar, the mild nuttiness of provolone, and the incredible stretch and melt of mozzarella. I like to make sure there’s plenty of cheese on each individual roll section, ensuring every bite is cheesy perfection. Feel free to add an extra sprinkle of salt and pepper here if you like.
-
Complete the Assembly with the Top Layer:
Carefully place the top half of your Hawaiian rolls, cut-side down, over the layered cheeses. Gently press down on the top of the rolls to ensure good contact between the cheese and the bread. This helps the cheese melt more uniformly and keeps everything together. Now, take the remaining half of your melted garlic-herb butter mixture and generously brush it over the entire top surface of the assembled rolls. This will be the side that cooks first and develops that beautiful golden crust. Ensure an even coating for uniform browning. You should now have a large, buttered, cheese-filled block of Hawaiian rolls ready for the heat.
The Cooking Process: Achieving Golden Perfection
-
Preheat Your Cooking Surface to the Perfect Temperature:
Place a large non-stick skillet, griddle, or even a cast-iron pan (my personal favorite for grilled cheese!) over medium-low heat. It’s crucial not to rush this step with high heat. A medium-low temperature allows the butter to brown slowly and the cheese to melt thoroughly without burning the bread. Give your pan a good 3-5 minutes to preheat evenly. You should feel warmth radiating from it, but it shouldn’t be smoking. A perfectly preheated pan is key to achieving that even, golden crust.
-
Carefully Transfer the Assembled Rolls to the Pan:
Once your pan is at the ideal temperature, carefully lift the entire block of assembled Hawaiian rolls and place it, buttered-side down, into the preheated skillet. If your pan isn’t large enough to accommodate the entire 12-roll block, you can gently cut the block into two 6-roll sections or even three 4-roll sections before placing them in the pan. Avoid overcrowding the pan; you want enough space for even cooking and heat distribution. The glorious sizzling sound as the buttered bread hits the hot pan is truly music to my ears!
-
Cook the First Side to Golden-Brown Perfection:
Let the rolls cook on this first side for about 5-7 minutes. This duration can vary slightly depending on your stove and pan, so keep a close eye on it. You’re looking for a beautiful, deep golden-brown crust. Gently lift a corner of the block with a spatula to check the color. The low-medium heat is essential here; it gives the cheese ample time to start melting from the bottom up while the bread slowly toasts. You’ll also notice the aroma of garlic butter filling your kitchen – a sure sign that something delicious is happening.
-
Cover the Pan for Optimal Cheese Melt:
Once the bottom side is beautifully golden, reduce the heat slightly to low. Now, here’s a trick for incredibly gooey cheese: place a lid over the skillet. If your skillet doesn’t have a lid, you can use a large baking sheet or aluminum foil to create a dome. Covering the pan traps the heat, essentially steaming the cheese and encouraging it to melt completely and evenly throughout the center of the sandwiches. Let it cook covered for another 3-4 minutes. This step is a non-negotiable for achieving that gloriously melted, ooey-gooey interior that makes this Hawaiian Roll Grilled Cheese Recipe The Best!
-
The Grand Flip: Turning Your Golden Creation:
After the cheese has started to melt beautifully, it’s time for the flip! This can be a bit of a strategic maneuver if you’re cooking the whole block. Using one or two wide spatulas, carefully slide them underneath the entire block of rolls. With a swift, confident motion, flip the entire block over to cook the second side. If you divided your rolls earlier, flip each section individually. The goal is to keep the integrity of the block intact as much as possible, though a little shifting is totally fine.
-
Cook the Second Side and Ensure Maximum Melt:
Once flipped, continue cooking the second side (the side that was brushed with butter last) for another 4-6 minutes, or until it’s also golden brown and crisp. Keep the pan covered for at least part of this cooking time to ensure the cheese is fully melted and incredibly gooey. The gentle heat will continue to work its magic, transforming the soft Hawaiian rolls into a crispy, buttery vessel for the warm, stretchy cheese. You’ll likely see some cheese gently oozing out the sides – a very good sign indeed!
-
Confirm Doneness for Ultimate Satisfaction:
To ensure your grilled cheese is perfect, check both sides for that perfect deep golden-brown color and crisp texture. More importantly, peek inside to confirm that all the cheese layers are completely melted and luscious. There should be no firm spots of cheese left. If you feel it needs a little more browning or melting, continue cooking for another minute or two, adjusting the heat as necessary to prevent burning. The glorious aroma of toasted bread and melted cheese will be undeniable, signaling that your masterpiece is ready.
Serving Suggestions and Enjoying Your Delicious Creation
-
Remove and Prepare for Serving:
Once your Hawaiian roll grilled cheese is perfectly golden-brown on both sides and the cheese is utterly melted and gooey, carefully remove the entire block from the skillet and transfer it to a clean cutting board. It will be hot, so handle with care! The warmth and the incredible aroma are almost overwhelming at this stage.
-
Slice and Serve Immediately for Peak Enjoyment:
Using a sharp knife, carefully slice along the perforations between each individual roll. This will create 12 perfectly portioned, miniature grilled cheese sandwiches. Or, if you’re feeling a little rustic, you can simply pull them apart by hand – they’re usually tender enough to do so easily once the cheese has acted as a binding agent.
-
Optional Garnish for an Extra Touch:
For an extra touch of freshness and visual appeal, you can sprinkle a little fresh chopped parsley over the tops of the finished grilled cheese sandwiches. A tiny sprinkle of flaky sea salt on top can also amplify the flavors, especially if you used unsalted butter and minimal seasoning earlier.
-
Enjoying Your Masterpiece:
Serve these delightful Hawaiian Roll Grilled Cheese sandwiches immediately while they are hot and the cheese is at its peak meltiness. The combination of sweet bread, savory garlic butter, and gooey, melty cheese is absolutely divine.
Why This Hawaiian Roll Grilled Cheese Recipe Is The Best
Honestly, the balance of sweet and savory here is simply unmatched. The soft, sweet Hawaiian rolls become beautifully toasted and crisp on the outside, while the interior is a symphony of warm, stretching, flavorful cheese. It’s comfort food perfected, and it consistently gets rave reviews every time I make it.
-
Pairings and Variations for an Even More Indulgent Experience:
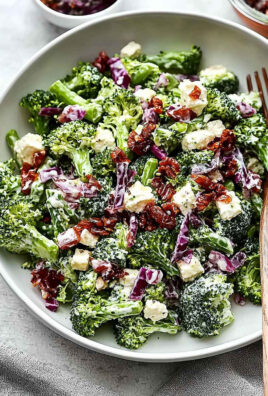
These mini grilled cheese sandwiches are fantastic on their own, but they also make an incredible accompaniment to a warm bowl of tomato soup – a classic pairing that never disappoints. They’re also wonderful served with a crisp green salad, a side of pickles for a tangy counterpoint, or even some fruit for a balanced meal. For variations, consider adding a thin slice of ham or turkey for a mini grilled cheese and ham/turkey slider. A dollop of caramelized onions between the cheese layers adds an incredible depth of flavor. You could also experiment with different cheeses, like a spicy Monterey Jack for a kick, or a creamy Gruyère for a more sophisticated profile. Some people even like to brush the rolls with mayonnaise instead of butter for an extra crispy crust, though I personally love the flavor the butter brings to This Hawaiian Roll Grilled Cheese Recipe Is The Best. The possibilities are endless for customizing this incredibly versatile and utterly delicious treat!
<h2>Conclusion:</h2>
<p>Well, my friends, we’ve reached the delicious culmination of our culinary journey! I sincerely hope you’ve enjoyed exploring the magic behind this incredibly simple yet profoundly satisfying creation. If there’s one recipe I could urge you to try from my entire collection, it would undoubtedly be this one. It transcends the humble grilled cheese, elevating it to an experience that is both comforting and exciting, familiar yet utterly fresh.</p>
<p>What makes this particular recipe an absolute game-changer, you ask? It’s the harmonious fusion of the unexpected with the beloved. The inherent sweetness and incredible softness of the Hawaiian rolls are the secret heroes here, transforming every bite into a delightful balance of sweet and savory. Imagine that pillowy texture, slightly toasted to a golden perfection, giving way to an avalanche of warm, molten cheese. It’s not just a sandwich; it’s a moment of pure, unadulterated joy. Whether you’re a seasoned chef or a kitchen novice, the ease with which you can whip up this masterpiece is truly remarkable, making it an ideal choice for a quick lunch, a satisfying snack, or even a fun, fuss-free dinner.</p>
<p>But the beauty of this dish doesn’t stop at its core perfection; it also lies in its incredible versatility. While it’s absolutely divine on its own, I encourage you to think of it as a canvas for your culinary creativity. For a classic pairing that never fails, serve it alongside a steaming bowl of creamy tomato soup – the rich, tangy soup is the perfect counterpoint to the sweet, cheesy sandwich. A crisp, light green salad with a zesty vinaigrette can also cut through the richness beautifully, offering a refreshing side.</p>
<h4>Elevate Your Experience with These Serving Suggestions and Variations:</h4>
<p>Ready to experiment? Try adding a slice or two of crispy bacon inside for a salty, smoky crunch. Caramelized onions can introduce a deep, savory sweetness that complements the rolls wonderfully. A few slices of roasted red pepper or a smear of pesto can add an intriguing layer of flavor and color. Don’t be afraid to mix up your cheeses either! While American is a classic for its melt, sharp cheddar, nutty Gruyère, or even a spicy Monterey Jack can introduce exciting new dimensions. For those who enjoy a touch of heat, a sprinkle of red pepper flakes or a thin slice of jalapeño can provide a welcome kick.</p>
<p>Want to take it to a truly gourmet level? <strong>Consider serving it with a fig jam or a thin slice of apple or pear for an exquisite sweet and savory combination that will truly surprise and delight your taste buds.</strong> Dipping sauces are another fantastic avenue for personalization. Beyond the traditional ketchup, try a sriracha mayo for a spicy zing, a honey mustard for a sweet and tangy twist, or even a simple garlic aioli for a sophisticated touch. This recipe isn’t just for lunch; imagine it as part of a brunch spread with a fried egg nestled inside, or as a late-night comfort food indulgence. The possibilities are genuinely endless, and each variation only solidifies my belief that <strong>This Hawaiian Roll Grilled Cheese Recipe Is The Best</strong> because it’s so adaptable.</p>
<p>So, what are you waiting for? Arm yourself with those delightful Hawaiian rolls and your favorite cheese, and get ready to create something truly special. This recipe is a testament to the fact that extraordinary flavor often comes from the simplest ingredients, expertly combined. I promise you, one bite of this warm, gooey, sweet-and-savory sensation, and you’ll be hooked.</p>
<h5>Share Your Culinary Adventures!</h5>
<p>I’m absolutely thrilled about the thought of you trying this recipe in your own kitchen. There’s immense joy in cooking and sharing delicious food, and I’d love to hear all about your experience. Did you add a unique ingredient? Did you pair it with a special soup? Whatever your culinary adventure, please don’t hesitate to share your thoughts, your photos, and your clever variations in the comments below. Your feedback and creativity inspire me and the entire community. Let’s spread the joy of this amazing grilled cheese together! Happy cooking, and may your kitchen be filled with wonderful aromas and even more wonderful memories.</p>

Best Hawaiian Roll Grilled Cheese: Easy & Delicious Recipe
Experience an irresistible fusion of sweet and savory with this Hawaiian Roll Grilled Cheese. Golden, buttery crispness of a sweet roll perfectly complements rich, gooey, melted cheese. It’s an elevated culinary experience that transforms a classic comfort food into something truly extraordinary.
Ingredients
-
1 (12-count) package King’s Hawaiian Original Hawaiian Sweet Rolls
-
4 tbsp unsalted butter, melted
-
4 oz sliced sharp cheddar cheese
-
4 oz sliced provolone cheese
-
4 oz shredded mozzarella cheese
-
1/2 tsp dried oregano
-
1/2 tsp garlic powder
-
1/2 tbsp dried parsley
-
Pinch of sea salt & black pepper (optional)
Instructions
-
Step 1
Slice the entire block of 12 Hawaiian rolls horizontally, creating a top and bottom half. Keep rolls connected. -
Step 2
Melt butter. Stir in garlic powder, dried oregano, dried parsley, and optional salt & pepper until well combined. -
Step 3
Place bottom roll half, cut-side up, on a board. Brush generously with half of the butter mixture. -
Step 4
Layer cheddar, provolone, and mozzarella cheeses evenly over the buttered bottom rolls. -
Step 5
Place top roll half, cut-side down, over cheese. Press gently. Brush top with remaining butter mixture. -
Step 6
Heat a large skillet or griddle over medium-low heat. Carefully place the assembled rolls, buttered-side down, into the pan. If needed, divide into sections. Cook for 5-7 minutes until golden brown. -
Step 7
Reduce heat to low, cover the pan, and cook for 3-4 minutes to thoroughly melt the cheese. -
Step 8
Using spatulas, flip the entire block (or sections). Cook for another 4-6 minutes until the second side is golden and cheese is fully melted and gooey. Keep covered for part of this time. -
Step 9
Transfer grilled cheese to a cutting board. Slice along perforations to create 12 individual mini grilled cheese sandwiches. -
Step 10
Garnish with fresh parsley or a pinch of flaky sea salt, if desired. Serve immediately while hot and gooey. Enjoy on their own, with tomato soup, or as sliders with a thin slice of beef or turkey.
Important Information
Nutrition Facts (Per Serving)
It is important to consider this information as approximate and not to use it as definitive health advice.
Allergy Information
Please check ingredients for potential allergens and consult a health professional if in doubt.


Leave a Comment