

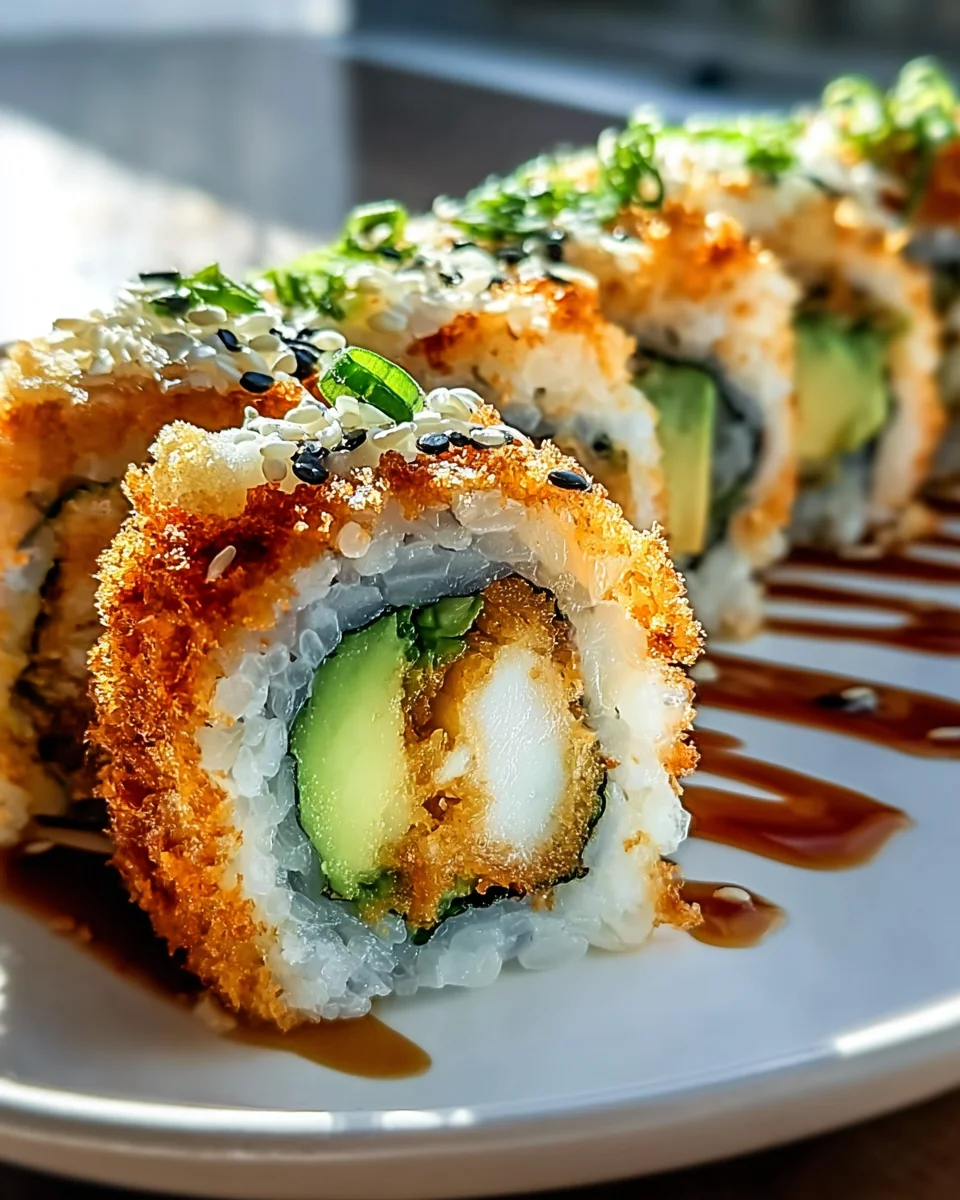
One rainy afternoon, I found myself cozied up in a small sushi restaurant tucked away in a bustling corner of the city. The scent of sizzling tempura wafted through the air, mingling with the salty tang of soy sauce and the sweet hint of pickled ginger. It was there that I first encountered the Crispy Chicken Tempura Roll, a delightful fusion of crunchy tempura chicken wrapped in plush sushi rice, all embraced by a nori blanket. Each bite was an explosion of textures—crispy, soft, and oh-so-satisfying. I remember feeling a wave of comfort wash over me, as if each roll was a warm hug on a dreary day.
This recipe holds a special place in my heart, as it combines my love for Japanese cuisine with the beloved flavors of fried chicken. In my version, I take extra care to achieve the perfect crispiness by double frying the chicken, ensuring that each piece is golden and crunchy, yet tender on the inside. The addition of a spicy mayo drizzle brings a delightful kick, balancing the savory elements perfectly. It’s not just a roll; it’s an experience, a celebration of flavors that will transport you to that cozy restaurant, even if you’re in your own kitchen.
So, are you ready to bring this delightful dish into your home? Let me show you exactly how to make it!

Why You’ll Love This Recipe
- Experience a unique fusion of textures with the crispy chicken tempura perfectly contrasting the creamy avocado, creating a delightful bite.
- Ready in under 55 minutes with minimal cleanup, you can enjoy a restaurant-quality sushi experience at home without the hassle.
- This budget-friendly recipe uses common ingredients, making it easy to whip up without breaking the bank.
- Each roll is packed with protein and healthy fats, offering a balanced meal that’s both satisfying and delicious.
- Perfect for lunch or dinner, it’s versatile enough to impress guests or satisfy a family craving for sushi!
Ingredients
- 2 cups short-grain rice (Calrose or Nishiki rice are ideal)
- 2.5 cups cold water
- 1/4 cup rice vinegar
- 2 tablespoons sugar
- 1 teaspoon salt
- 2 pieces chicken breast (slice against the grain)
- 1 cup plain flour (for coating)
- 1/2 cup corn flour (cornstarch)
- 1 teaspoon salt
- 1 teaspoon black pepper
- 2-3 cups neutral cooking oil (for frying)
- 1 sheet nori
- 1 piece ripe avocado
- to taste white and black sesame seeds (optional garnishes)
The star ingredient of this recipe is the short-grain rice, which provides the perfect sticky texture needed for sushi rolls. It’s essential to use Calrose or Nishiki rice to achieve that authentic sushi feel. If you can’t find these varieties, any short-grain rice will work, but avoid long-grain types as they won’t hold together well.
Next, the chicken breast is crucial for creating that crispy tempura texture. Make sure to slice the chicken against the grain for tenderness. You can substitute chicken with tofu or shrimp for a different protein option. The corn flour (or cornstarch) is vital for the tempura coating, giving it that beautiful crunch. If you’re out of corn flour, you can use potato starch, though it may slightly alter the texture.
Step-by-Step Instructions
- Rinse the short-grain rice under cold water until the water runs clear, about 3-4 times. This removes excess starch and helps achieve a better texture. Drain the rice and transfer it to a medium pot.
- Add 2.5 cups of cold water to the pot with the rinsed rice. Let it soak for 30 minutes to help the grains absorb moisture, ensuring even cooking.
- After soaking, bring the rice and water to a boil over medium-high heat. Once boiling, reduce the heat to low, cover, and simmer for 15 minutes until the water is absorbed and the rice is tender. Avoid lifting the lid during cooking, as this traps steam necessary for cooking.
- While the rice cooks, prepare the sushi vinegar. In a small saucepan, combine 1/4 cup rice vinegar, 2 tablespoons sugar, and 1 teaspoon salt. Heat over low until the sugar dissolves, about 2-3 minutes. Once dissolved, remove from heat and let it cool.
- Once the rice is done, transfer it to a large bowl and gently fold in the sushi vinegar mixture with a spatula. Let it cool to room temperature while you prepare the chicken.
- Slice the chicken breasts against the grain into thin strips. In a mixing bowl, combine 1 cup plain flour, 1/2 cup corn flour, 1 teaspoon salt, and 1 teaspoon black pepper. Coat each chicken piece in this flour mixture, pressing gently to adhere.
- In a large skillet or deep fryer, heat 2-3 cups of neutral cooking oil over medium-high heat until it reaches 350°F (175°C). To test if the oil is ready, drop a small piece of batter in; it should sizzle immediately.
- Carefully add the coated chicken pieces to the hot oil in batches, avoiding overcrowding. Fry for about 4-5 minutes until golden brown and crispy, turning halfway through. Use a slotted spoon to remove the chicken and place it on paper towels to drain excess oil.
- Prepare the nori sheet by placing it shiny side down on a bamboo sushi mat. Wet your hands to prevent sticking and grab a handful of sushi rice, spreading it evenly across the nori, leaving a 1-inch border at the top.
- Place a few strips of the crispy chicken and slices of ripe avocado horizontally across the rice. If desired, sprinkle sesame seeds over the filling for added texture.
- Using the sushi mat, carefully roll the sushi away from you, applying gentle pressure to create a tight roll. Seal the edge of the nori with a bit of water.
- Using a sharp knife, slice the roll into 6-8 pieces, wiping the knife with a damp cloth between cuts for clean slices. Serve with soy sauce, wasabi, and pickled ginger.
Pro Tips for the Best Crispy Chicken Tempura Roll
- To achieve the crispiest chicken tempura, ensure your oil is at the correct temperature (350°F). If it’s too cool, the chicken will absorb oil and become greasy; if it’s too hot, it will burn before cooking through.
- Invest in a good bamboo sushi mat; it makes rolling sushi much easier and helps you achieve a tight, even roll. If you don’t have one, a clean kitchen towel can work as a makeshift mat.
- When preparing the tempura batter, avoid over-mixing. A few lumps are okay; this will create a lighter, airier coating when fried.
- A common mistake is not letting the rice cool to room temperature before rolling it. Hot rice can cause the nori to become soggy, affecting the overall texture of your roll.
- Experiment with your fillings! You can add sliced cucumber or pickled radish for extra crunch and flavor. The combination is limitless!
Variations & Serving Ideas
- For a spicy kick, add a layer of spicy mayo or sriracha to your filling, or mix it with the sliced avocado.
- Try substituting the chicken with shrimp tempura for a seafood twist; just ensure the shrimp is peeled and deveined before frying.
- For a vegetarian option, replace the chicken with tempura-fried vegetables like sweet potatoes, zucchini, or bell peppers.
- Incorporate seasonal ingredients, like sliced mango or cucumber, for a refreshing summer roll.
When serving, I recommend pairing your crispy chicken tempura roll with a light miso soup or a fresh cucumber salad. The soup complements the sushi without overpowering it, while the salad adds a refreshing crunch. You can also serve it alongside some edamame for a nutritious and delicious side.
Storage, Make-Ahead & Reheating
Store any leftover crispy chicken tempura roll in an airtight container in the refrigerator for up to 2 days. Unfortunately, sushi rolls do not freeze well due to the rice texture change upon thawing. For reheating, place the rolls in a toaster oven at 350°F for about 5-7 minutes to restore some crispiness. Interestingly, some find that the flavors develop and taste even better the next day, so don’t hesitate to enjoy your leftovers!
Frequently Asked Questions
Can I make Crispy Chicken Tempura Roll ahead of time?
Yes — in fact, it tastes even better the next day! Just be sure to store it properly in an airtight container to maintain freshness.
What type of rice is best for sushi rolls?
Short-grain rice, particularly Calrose or Nishiki, is ideal for sushi rolls. These varieties provide the sticky texture necessary for the rice to hold together well.
Can I use other proteins besides chicken?
Absolutely! Shrimp, tofu, or even thinly sliced beef can be used as alternatives. Just adjust cooking times accordingly for different proteins.
How do I keep my sushi rolls from falling apart?
Ensure the rice is sticky enough by using short-grain rice and letting it cool to room temperature before rolling. A tight roll using a sushi mat also helps maintain structure.
What dipping sauces pair well with Crispy Chicken Tempura Rolls?
Soy sauce is a classic choice, but you can also try a spicy mayo or eel sauce for added flavor. A drizzle of sesame oil can elevate the taste even further!
Final Thoughts
The Crispy Chicken Tempura Roll is a delightful fusion of flavors and textures that brings a satisfying crunch and comforting warmth to any meal. The tender chicken, perfectly coated in a light, crispy tempura batter, pairs beautifully with the fresh ingredients, creating a dish that’s as pleasing to the palate as it is visually striking.
This is the kind of recipe I come back to again and again, especially when I want to impress friends at a gathering or simply indulge in something delicious at home. It’s versatile and fun to make, allowing for personal touches that reflect your own taste.
I encourage you to give this recipe a try! Experiment with your favorite fillings, and don’t forget to share your results or any unique twists you add. Happy cooking!
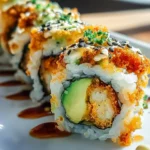
Crispy Chicken Tempura Sushi Roll
- Total Time: 55 minutes
- Yield: 4 servings 1x
Description
Experience the delightful fusion of crispy tempura chicken wrapped in plush sushi rice, all embraced by a nori blanket. This recipe brings the comforting flavors of a sushi restaurant right into your home.
Ingredients
- 2 cups short-grain rice (Calrose or Nishiki rice are ideal)
- 2.5 cups cold water
- 1/4 cup rice vinegar
- 2 tablespoons sugar
- 1 teaspoon salt
- 2 pieces chicken breast (slice against the grain)
- 1 cup plain flour (for coating)
- 1/2 cup corn flour (cornstarch)
- 1 teaspoon salt
- 1 teaspoon black pepper
- 2–3 cups neutral cooking oil (for frying)
- 1 sheet nori
- 1 piece ripe avocado
- to taste white and black sesame seeds (optional garnishes)
Instructions
- Rinse the short-grain rice under cold water until the water runs clear, about 3-4 times. This removes excess starch and helps achieve a better texture. Drain the rice and transfer it to a medium pot.
- Add 2.5 cups of cold water to the pot with the rinsed rice. Let it soak for 30 minutes to help the grains absorb moisture, ensuring even cooking.
- After soaking, bring the rice and water to a boil over medium-high heat. Once boiling, reduce the heat to low, cover, and simmer for 15 minutes until the water is absorbed and the rice is tender. Avoid lifting the lid during cooking, as this traps steam necessary for cooking.
- While the rice cooks, prepare the sushi vinegar. In a small saucepan, combine 1/4 cup rice vinegar, 2 tablespoons sugar, and 1 teaspoon salt. Heat over low until the sugar dissolves, about 2-3 minutes. Once dissolved, remove from heat and let it cool.
- Once the rice is done, transfer it to a large bowl and gently fold in the sushi vinegar mixture with a spatula. Let it cool to room temperature while you prepare the chicken.
- Slice the chicken breasts against the grain into thin strips. In a mixing bowl, combine 1 cup plain flour, 1/2 cup corn flour, 1 teaspoon salt, and 1 teaspoon black pepper. Coat each chicken piece in this flour mixture, pressing gently to adhere.
- In a large skillet or deep fryer, heat 2-3 cups of neutral cooking oil over medium-high heat until it reaches 350°F (175°C). To test if the oil is ready, drop a small piece of batter in; it should sizzle immediately.
- Carefully add the coated chicken pieces to the hot oil in batches, avoiding overcrowding. Fry for about 4-5 minutes until golden brown and crispy, turning halfway through. Use a slotted spoon to remove the chicken and place it on paper towels to drain excess oil.
- Prepare the nori sheet by placing it shiny side down on a bamboo sushi mat. Wet your hands to prevent sticking and grab a handful of sushi rice, spreading it evenly across the nori, leaving a 1-inch border at the top.
- Place a few strips of the crispy chicken and slices of ripe avocado horizontally across the rice. If desired, sprinkle sesame seeds over the filling for added texture.
- Using the sushi mat, carefully roll the sushi away from you, applying gentle pressure to create a tight roll. Seal the edge of the nori with a bit of water.
- Using a sharp knife, slice the roll into 6-8 pieces, wiping the knife with a damp cloth between cuts for clean slices. Serve with soy sauce, wasabi, and pickled ginger.
- Prep Time: 30 mins
- Cook Time: 25 mins
- Category: Dinner
- Method: Frying
- Cuisine: Japanese
Nutrition
- Serving Size: 1 roll
- Calories: 450
- Sugar: 3 g
- Sodium: 600 mg
- Fat: 20 g
- Saturated Fat: 3 g
- Unsaturated Fat: 15 g
- Trans Fat: 0 g
- Carbohydrates: 50 g
- Fiber: 2 g
- Protein: 25 g
- Cholesterol: 70 mg
Keywords: To achieve the crispiest chicken tempura, ensure your oil is at the correct temperature (350°F). If it's too cool, the chicken will absorb oil and become greasy; if it's too hot, it will burn before cooking through. Experiment with your fillings! You can add sliced cucumber or pickled radish for extra crunch and flavor.

Leave a Comment